How To Design An Outdoor Kitchen?
Outdoor kitchens are a great addition to your outdoor living space. They can bring family and friends together and create a comfortable ambiance. After you meet with an experienced contractor and have your floor plan set, it is time to install your outdoor kitchen. There are several steps to install the outdoor kitchen of your dreams.
Build the frame – It is the most important step. The frame will be the solid foundation of your outdoor kitchen. Make sure the frame has the correct spacing for all appliances and added materials.
Sheath the frame – This simply means to cover your frame with a steady material.
Attach the lath – You will apply a lath, which resembles a honeycomb pattern. You will want to make sure it securely fits with no extra lath.
Applying scratch coat – A thin layer of mortar is coated around the lath. This makes attaching your facing much easier and it adheres better.
Score mortar – When the mortar is firm, it needs to be scored horizontally. This allows the facing to bond to the mortar.
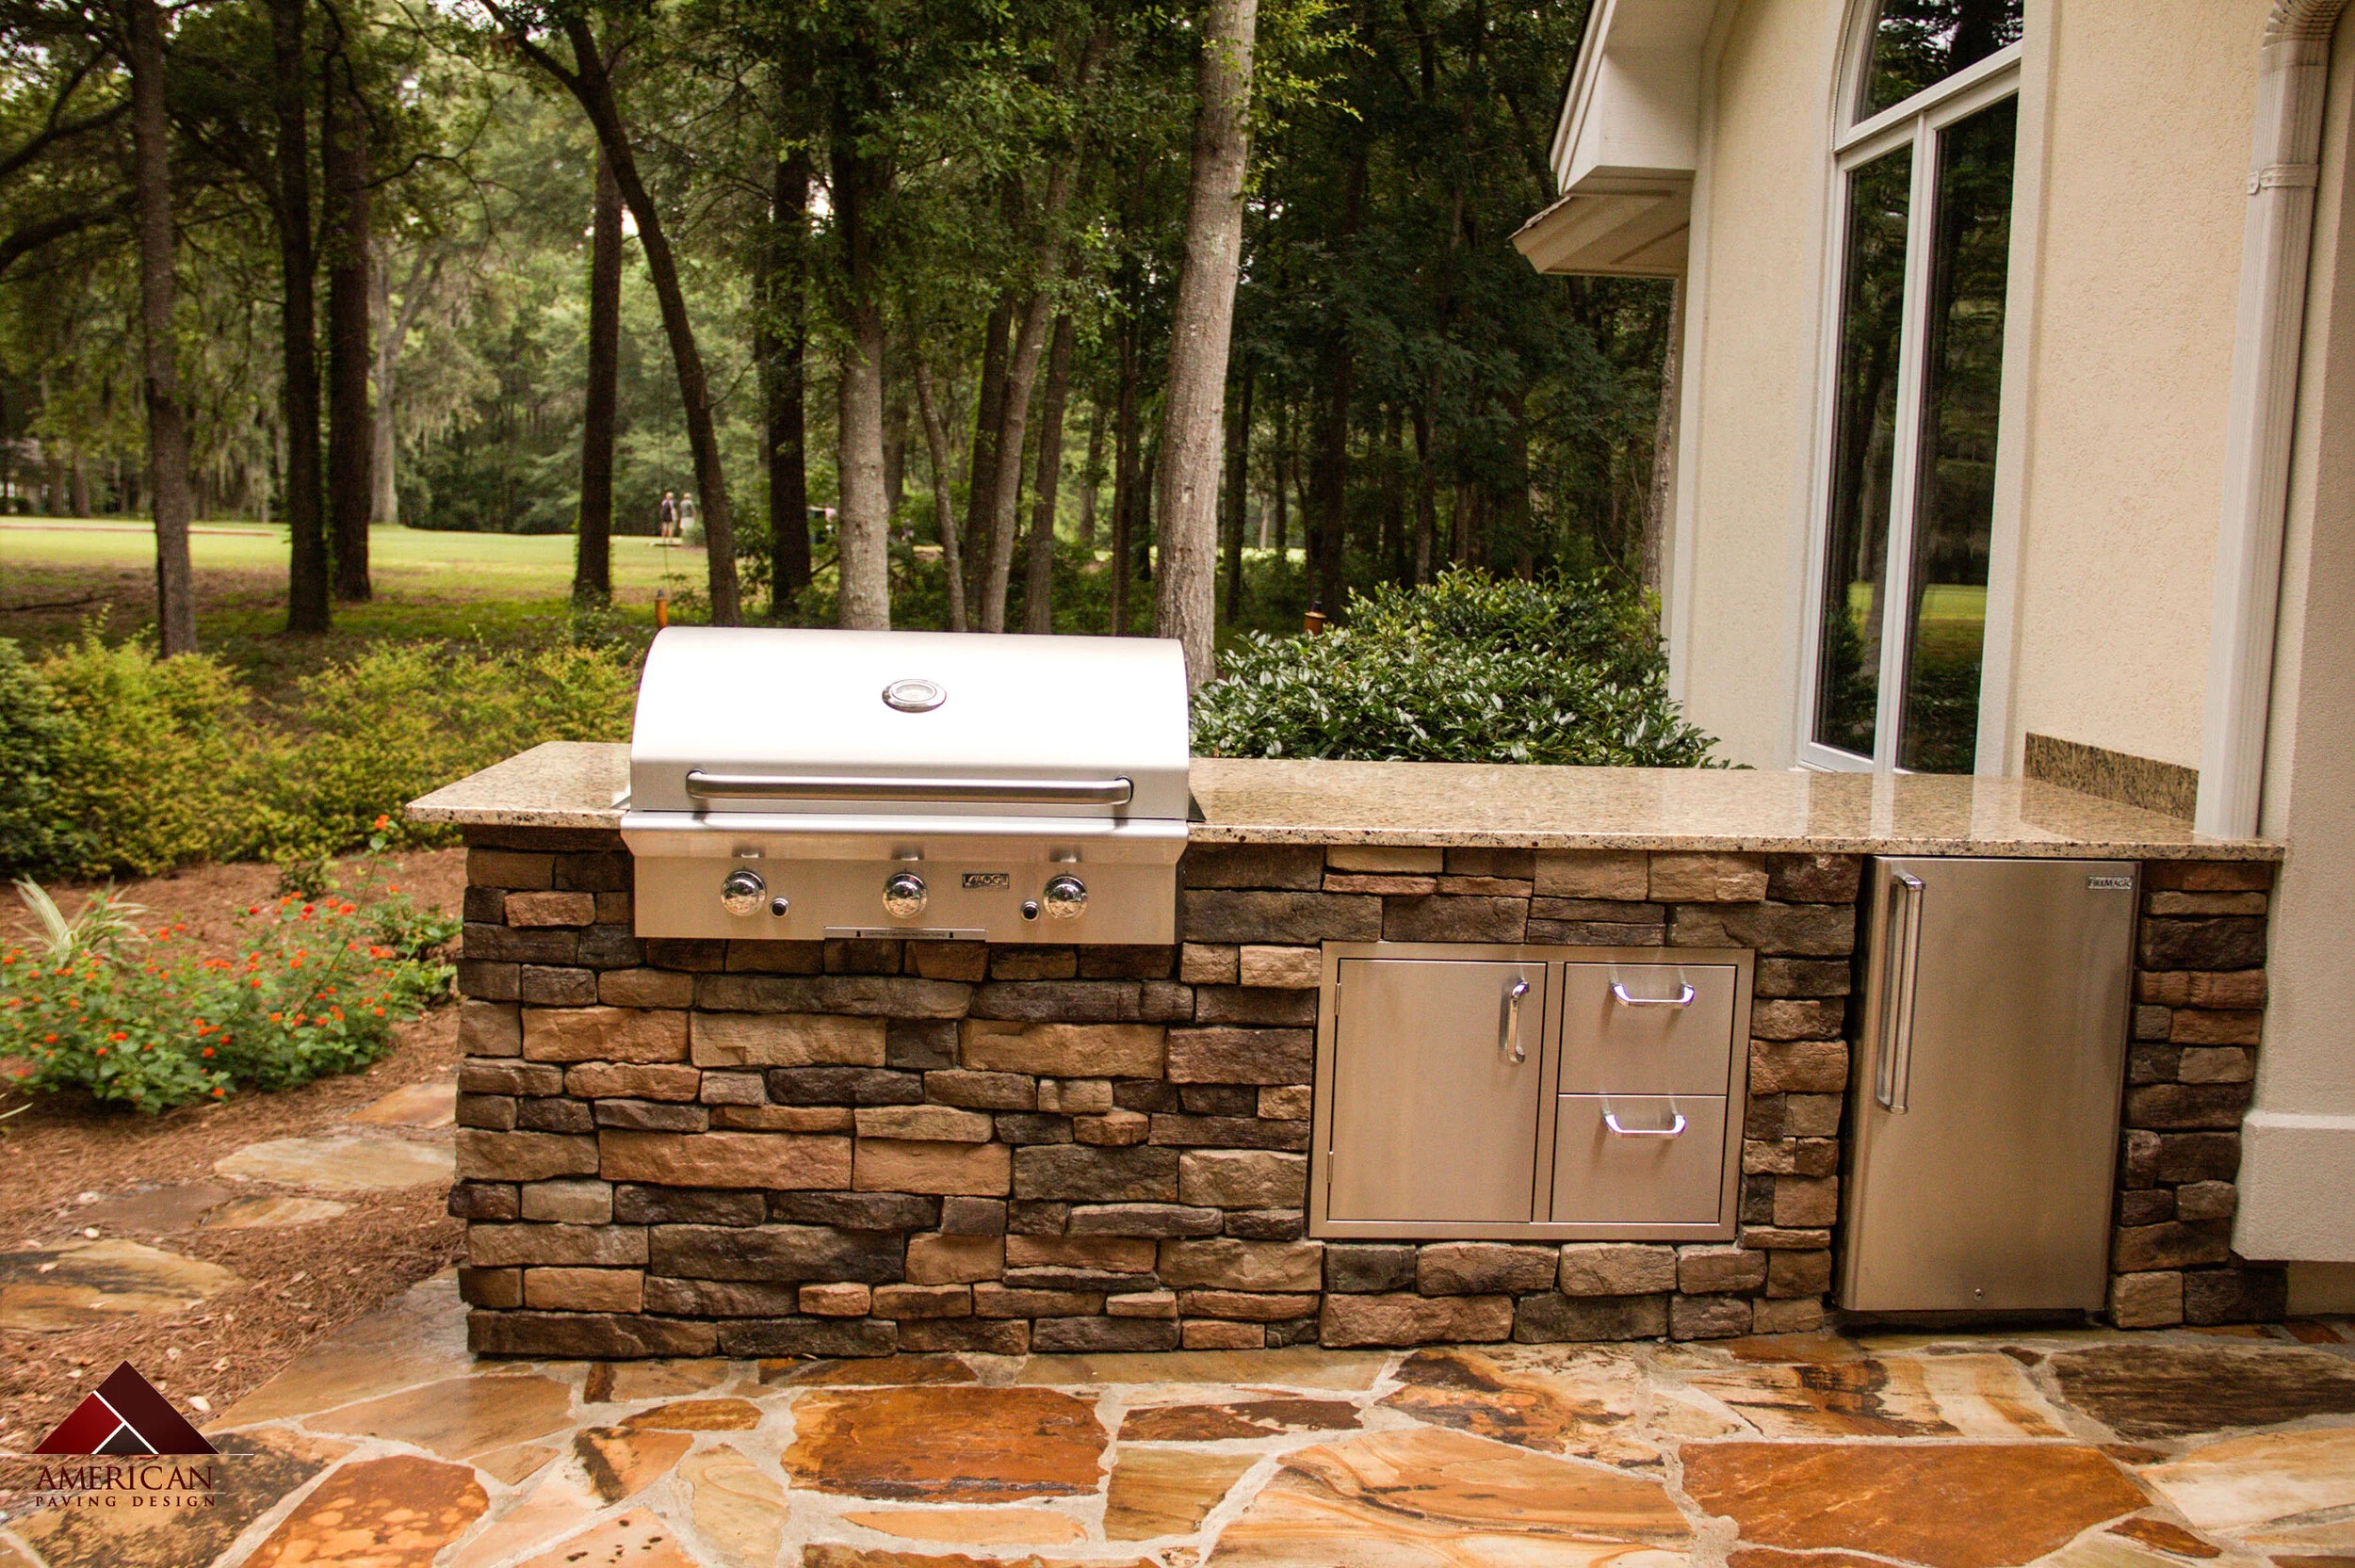
Apply facing – Separate your facing materials into different piles. Make a pile for specific areas of your project. Start with the base corners first. Make sure enough mortar is applied to the back of the material and scrape off extra when secured.
Install fixtures – Allow your facing to set for 24 hours before moving on. After you have securely created the base of your outdoor kitchen, you may start to install cabinets, appliances, and and other components.